
Sorry for the long hiatus. Last post, I talked briefly about the history of samplers. However, since this is not only a history blog, but a reenactment blog, the next step was, obviously, for me to make my own.
As I mentioned in the earlier post, the current image of a sampler is of a young girl’s first embroidered piece. While this is not the only purpose that samplers were used for, I decided to make mine as if it was an early piece of work. To that end, I stuck with simple stitches and bold, rainbow colors.
 The size for the sampler was decided so that it could be framed and displayed. While this might not have been an ultimate goal of a sampler a hundred years ago, it makes it more attractive today. Therefore, I chose an 8x10 inch size, so that it could fit easily into a frame. I then measured and cut plain white cotton to the proper size—this did include extra to allow me to mount it.
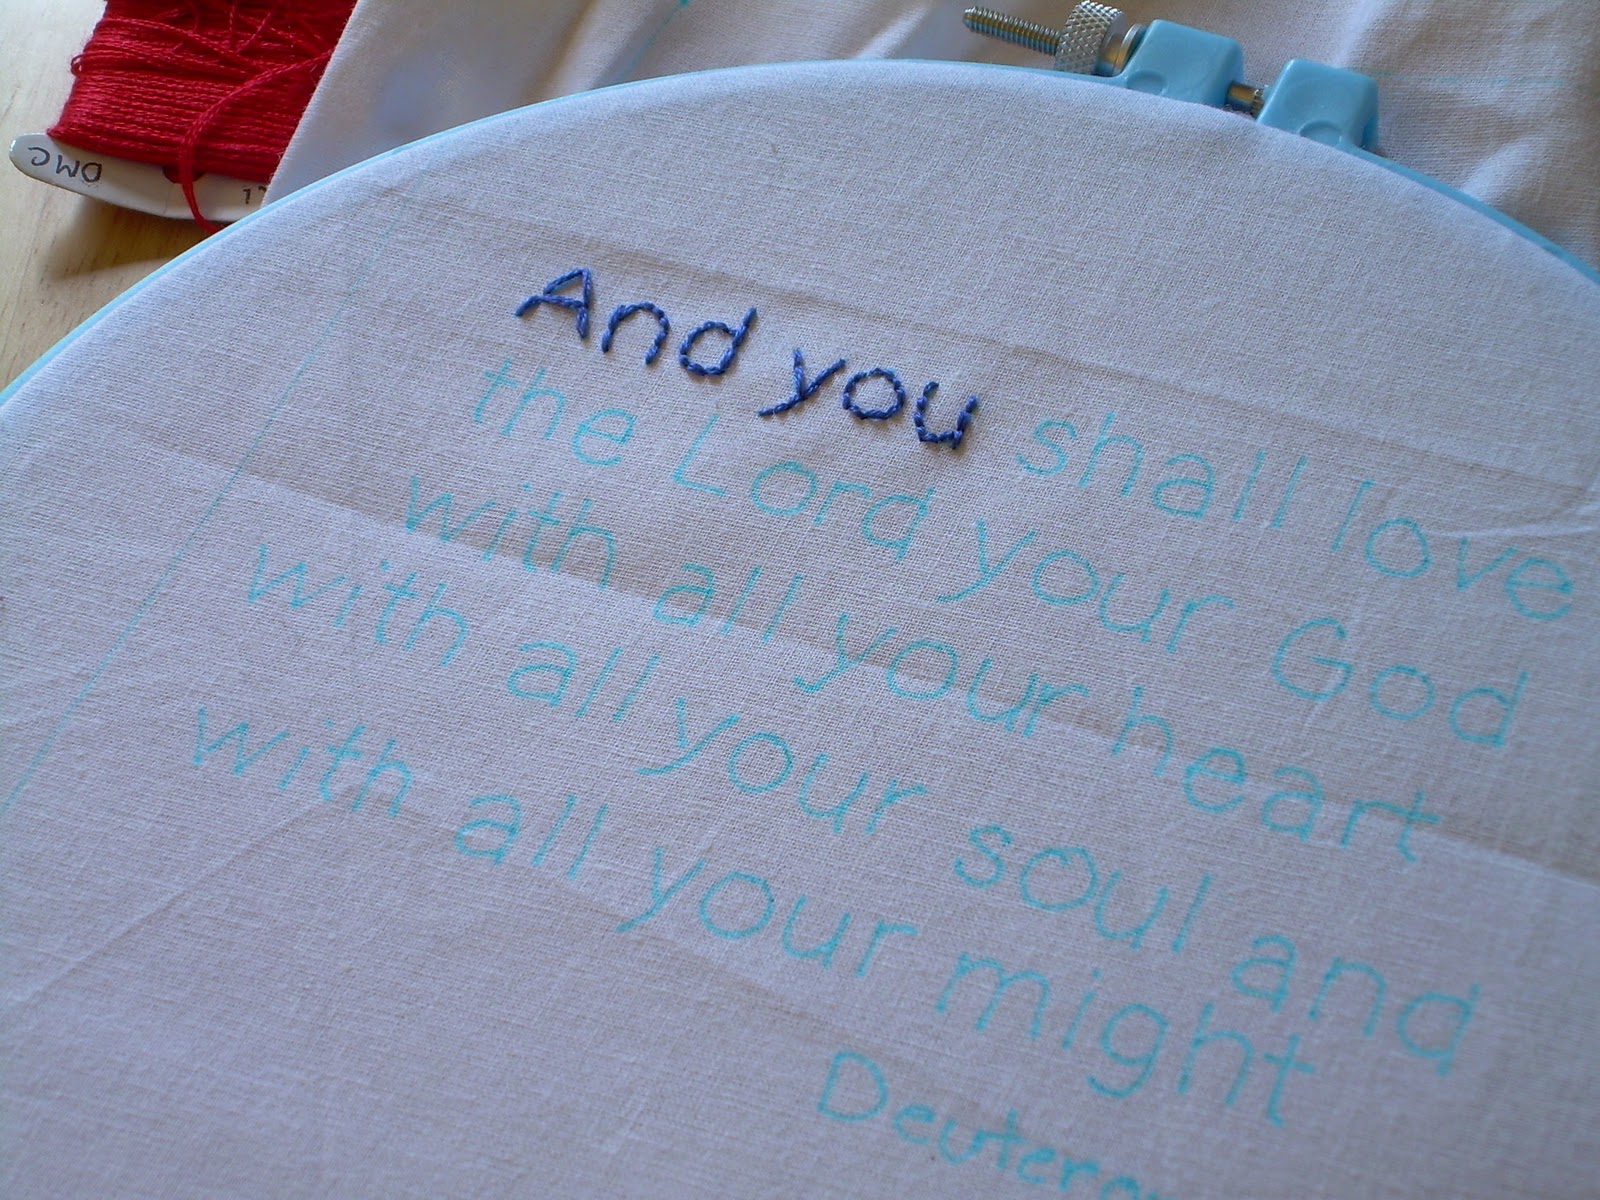
  I decided to have a Biblical quotation be in the center of the work-again, this was quite a common theme for young girls. I chose “And you shall love the Lord your God with all your heart, with all your soul and with all your might,” from Deuteronomy 6:5, simply because it is one of my favorites. It also has a slightly moralizing message, and would be considered appropriate for a young girl. To transfer the words, I typed up the passage, printed it and then traced it on to my fabric. This, obviously is a modern method of transferring, but it worked well here because the fabric was thin enough to read the letters easily. It was also the simplest way, if not the most historically accurate. I used a water soluble transfer pen for all markings. Here is the cloth with the words traced.
Next, I needed to stitch the words. First, I inserted the fabric into a hoop to help hold it firm and prevent pulling while I stitched. I chose a royal blue for the lettering, as a strong color that would show up well. For the letters, I used backstitch, which is probably the most basic of all embroidery stitches. It is a simple stitch, probably one of the first a girl would learn, and also very well suited to such work.

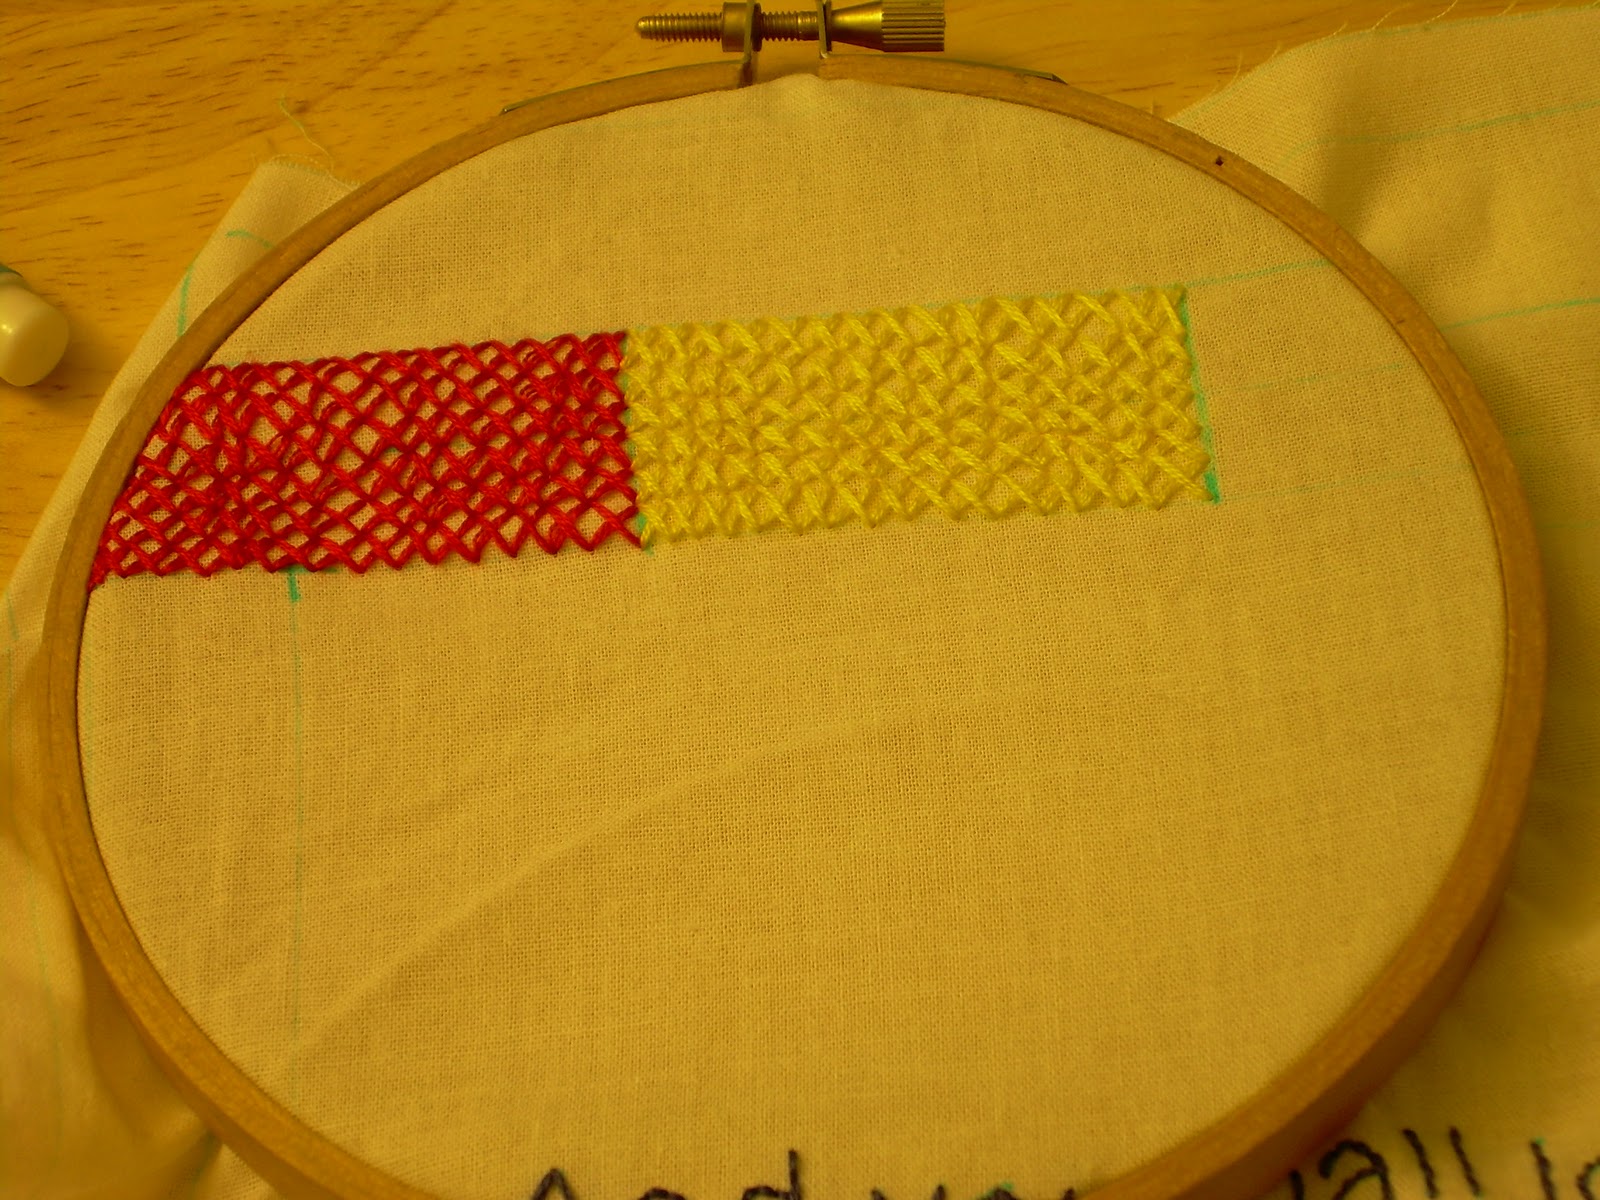
Once the quote was completed, I turned my attention to the border. In keeping with my desire to use simple stitches, I decided on a basic cross stitch. Again, this is one of the fundamental embroidery stitches and is exactly what the name seems to imply. Two small stitches are made, one crossing over the other, creating an x shaped stitch. It is commonly used to fill large areas. To insure even stitches, the number of threads under each stitch are often counted, when the fabric allows for it. I used red, yellow and green in a symmetrical pattern. (This desire for symmetry is why the purple that appears in the earlier photograph of the colors I was going to use does not appear in the finished piece.) The top and bottom blocks are one inch by two inches and the side blocks of green are an inch and a half wide. There are not the same number of stitches in each block, although effort was made to keep all stitches the same size.


Although all stitching was done, the sampler was not quite finished. As can be seen from the photographs above, it was quite wrinkled. Much of this was the result of the hoop used to hold the fabric firm. Therefore, it had to be ironed before anything more could be done. Note that the sampler is ironed upside down. This helps prevent damage to the stitching.
Once the sampler was ironed, it needed to be mounted. For this purpose, I used a piece of cardboard (the flat pieces that come in amazon.com boxes are perfect), cut to size. I then placed the cardboard on the back of the fabric, pulled it tight and fastened it down.


We have a sampler. Obviously, it is not framed yet. While I did order frames, and they have arrived (one of the reasons for the delay in this post), they turned out to be defective. One corner is not fastened properly. Therefore, I can not show the final, final product. Here, however, is the finished sampler, sans frame:

Once a non-defective frame has arrived, the completed sampler will be for sale in my etsy shop.
Don’t forget to like Bacovcin Embroidery on Facebook: http://www.facebook.com/pages/Bacovcin-Embroidery/151825994858293?ref=ts
No comments:
Post a Comment